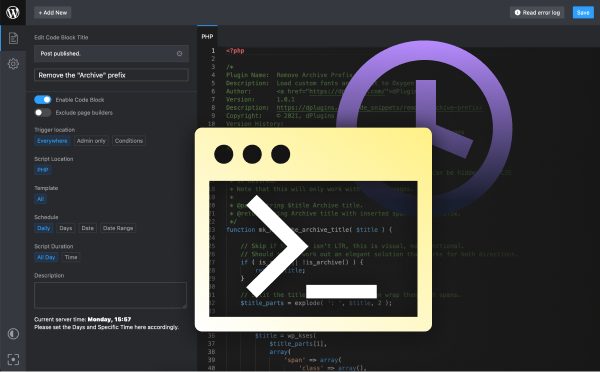
The WordPress Block Editor is a great way to build and style your WordPress website. It allows you to easily create beautiful pages and posts with its intuitive drag-and-drop interface. The block editor also has a variety of features that make it easy to customize the look and feel of your content. In this guide, we will look at how to use the WordPress Block Editor to create stunning pages and posts. We’ll also show you how to customize the look and feel of your content with the block editor. With the help of this guide, you will be able to create an amazing website in no time. So let’s get started.
A Beginner’s Guide to the WordPress Block Editor: What It Is and How to Use It.
Welcome to the wonderful world of the WordPress Block Editor! If you’re relatively new to WordPress, you may have heard of this revolutionary new way of creating content but aren’t quite sure how to use it. Don’t worry—we’ll walk you through everything you need to know to get started on your journey. The WordPress Block Editor is a powerful tool that allows you to create stunning content with ease. It gives you the ability to create stunning visuals without ever needing to touch a single line of code. You can easily add images, videos, and other media to your pages, customize the look and feel of your content, and create complex layouts all from within the editor. Now, let’s take a look at how to use the WordPress Block Editor. To begin, you’ll need to find the “Add Block” button at the top of the page. Clicking this will open a sidebar with a range of blocks that you can add to your content. Once you’ve selected a block, you can customize it to fit your needs. You can select a background color, add images, add text, and more. Once you’ve got your content just the way you like it, you can save your changes and publish your content to the web. It’s that easy! We hope this beginner’s guide to the WordPress Block Editor has been helpful. With the right tools and a bit of practice, you’ll be creating amazing content in no time! So, go forth and create!
How to Create and Edit Content Blocks in WordPress.
Creating and editing content blocks in WordPress is a great way to make your website look professional and organized. Whether you’re creating a new page or updating an existing one, content blocks are a great way to keep your content organized and make your site look attractive. Here’s how to create and edit content blocks in WordPress.
1. Login to your WordPress dashboard and navigate to the page where you want to add a content block.
2. Click the “Add Block” button at the top of the page.
3. Select the type of block you want to add. Options include text, image, video, and more.
4. Add your content to the block. You can edit the text, add images, videos, and more.
5. When you’re finished, click “Save” to save your content block.
6. To edit an existing content block, hover over it and click the pencil icon. You can then make changes to the content and click “Save” when you’re finished.
Creating content blocks in WordPress is a breeze! With just a few clicks, you can easily organize and style your content to make your website look professional and attractive. So get creative and make your website look amazing with content blocks!
How to Style Content Blocks in the WordPress Block Editor.
Are you ready to give your WordPress content blocks a makeover? With the WordPress Block Editor, it’s easier than ever to add a little pizzazz to your website pages!
Ready to get started? Here are a few tips to style your content blocks:
1. Use Color to Set the Mood: The right color palette can help set the mood for your content blocks. Choose colors that capture the essence of the topic and evoke the right emotion. You can select colors from the WordPress Color Palette, or choose your own custom colors.
2. Get Creative with Fonts: Fonts can be a great way to add visual interest to your content blocks. Experiment with different font sizes, styles, and weights to create an eye-catching display of text.
3. Add Images to Enhance Your Content: Images can help bring your content blocks to life. Choose photos that are relevant to your content and that capture the attention of the reader.
4. Get Creative with Layout: Play around with the layout of your content blocks to add visual interest. Try adding a few columns, adding a background image, or using shapes to highlight important parts of your message.
Making your content blocks stand out doesn’t have to be a daunting task. With a few simple tweaks, you can quickly transform your content blocks into something special. So go ahead, get creative, and have fun styling your content blocks in the WordPress Block Editor!
How to Create Reusable Blocks in the WordPress Block Editor.
Creating reusable blocks in the WordPress Block Editor is as easy as pie! With a few simple steps, you can have your content ready for reuse in no time. First, you’ll want to create a new block or edit an existing one. If you’re creating a new block, use the plus sign (+) at the top of the page to add the type of block you want. Once you’ve added it, the block editor will open up with the various options available to you. Next, you’ll want to add any content or styling you want to include in the reusable block. Once you’ve finished creating the block, click the three-dot menu in the top right corner and select “Save as Reusable Block”. Give your reusable block a name and click “Save”. Now that your reusable block is saved, you can use it on any post or page! To add it, click the plus sign (+) at the top of the page and select “Reusable Blocks”. Select the reusable block you created and click “Insert Block” to add it to your post or page. That’s it! With just a few simple steps, you can create and reuse your content in no time. So go ahead and get creative with your reusable blocks in the WordPress Block Editor!
How to Embed Media in the WordPress Block Editor.
Are you looking for a fun and creative way to add a little spark to your WordPress blog posts? The WordPress Block Editor can be a great way to add multimedia content to your posts. Whether you are looking to add videos, audio clips, GIFs or even Instagram posts, the Block Editor makes it easy to embed media into your content. Adding videos to your WordPress blog posts is a great way to engage your readers. With the Block Editor, it’s a breeze. All you have to do is copy the URL of the video you want to embed and paste it into the “Video” block. The video will automatically appear in the post. You can even customize the video by adding a caption, changing the size and more. If you’re looking to bring some audio to your blog post, you can easily embed audio clips with the Block Editor. Just upload the audio file to your media library and copy the URL of the audio file. Then simply paste the URL into the “Audio” block and it will automatically appear in the post. GIFs are a great way to add some fun to your posts. The Block Editor makes it easy to embed GIFs. Just copy the URL of the GIF from Giphy or another site and paste it into the “GIF” block. The GIF will automatically appear in your post. Finally, you can also embed Instagram posts into your blog posts with the Block Editor. All you have to do is copy the URL of the Instagram post and paste it into the “Instagram” block. The post will automatically appear in your post. So if you’re looking for a creative and cheerful way to add multimedia content to your WordPress blog posts, the Block Editor is the perfect tool. In just a few simple steps, you can easily embed videos, audio clips, GIFs and Instagram posts into your posts. So start adding some multimedia content to your WordPress blog posts and watch your engagement soar!
How to Use the WordPress Block Editor for Blog Posts.
Are you ready to take your blog posts to the next level with the WordPress Block Editor? This helpful tool makes it easy to create stunning content without having to go through a ton of complicated steps. With the WordPress Block Editor, you can craft creative and engaging blog posts in no time. First things first, you’ll need to open the WordPress Block Editor. You can find this by going to the WordPress dashboard and clicking on “Posts” in the left-hand sidebar. Then, click on “Add New” and you’ll be taken to the WordPress Block Editor. Now, it’s time to get creative! Start by adding a catchy title for your post. Then, you can get to work and start adding blocks of content. Whether you want to add images, videos, or text, the WordPress Block Editor makes it easy to do so. You can also customize the size and alignment of your blocks to create a stunning design. When you’re ready to add some text, the WordPress Block Editor has a handy “Text” block that you can use. This block lets you type out your content and you can even adjust the font size, color, and style. You can also add links, quotes, and other elements to make your post stand out. Once you’ve finished crafting your post, it’s time to hit “Publish”. With the WordPress Block Editor, you’ll be able to share your creative and cheerful blog posts with the world in no time!
Tips for Formatting Posts in the WordPress Block Editor.
1. Make use of the various block options to create visually appealing posts. You can choose from a wide variety of blocks to add elements like images, videos, and lists.
2. Use the Heading block to separate the different sections of your post. This will make it easier for readers to scan your post and find the information they’re looking for.
3. Use the Paragraph block to break up your content into smaller, easier-to-read chunks. This will make your post more inviting and easier to read.
4. Try to keep paragraphs short. Long paragraphs can be intimidating to readers, so it’s best to keep them to no more than three sentences.
5. Use the Quote block to highlight interesting or important pieces of information. This will draw readers’ attention and make your post stand out.
6. Use the Image block to add eye-catching visuals to your post. This will make it more engaging and help keep readers’ attention.
7. Use the List block to organize information into neat, easy-to-scan lists. This will make your post easier to read and help readers find what they’re looking for.
8. Use the Pullquote block to draw attention to important points or quotes. This will make your post look more professional and help readers focus on the key points.
9. Use the Columns block to organize your content into multiple columns. This will make your post look more organized and help readers find what they’re looking for.
10. Use the Embed block to add videos, audio, and other external content to your post. This will make your post more engaging and help keep readers’ attention.
Troubleshooting Problems in the WordPress Block Editor.
Having trouble with the WordPress Block Editor? Don’t worry – we’ve got you covered! Here are some tips to help you troubleshoot any problems you may have.
1. Clear your browser’s cache and cookies: Having the most up-to-date version of the Block Editor is key. Make sure you clear your browser’s cache and cookies so you can be sure you’re running the most recent version.
2. Check for plugin conflicts: Plugins can sometimes cause problems with the Block Editor. Check for any plugins that might be conflicting with the Block Editor and disable or remove them.
3. Try a different browser: If the problem persists, try using a different browser. This will help you determine if the problem is specific to one browser or if it is a more general issue.
4. Reach out for help: If all else fails, don’t hesitate to reach out for help. The WordPress support team is always ready and willing to help.
We hope these tips help you troubleshoot any problems you may have with the WordPress Block Editor. Good luck and happy editing!
How to Use the WordPress Block Editor to Create Custom Pages.
Creating custom pages with the WordPress Block Editor is easier than you think! Here are a few simple steps to help you get started:
1. Log into your WordPress Dashboard and choose “Pages” from the left-hand menu.
2. Click “Add New” to create a new page.
3. Write your page title and select “Block Editor” from the page editor.
4. You can now start building your page using the WordPress Block Editor. Simply choose the blocks you want to use and drag and drop them into the page.
5. When you’re done, click the “Publish” button to make your page live.
With the WordPress Block Editor, you can create custom pages with ease. Have fun customizing your pages and making them look exactly the way you want them to!
The WordPress Block Editor is a powerful and user-friendly tool for creating content for your website. With its intuitive design, it makes it easy to create beautiful content without having to learn HTML or CSS. By using the block editor, you can quickly and easily create content that is visually pleasing and engaging. Additionally, with the help of the many available plugins, you can customize your content even further to meet your unique needs. With the WordPress Block Editor, you can create content quickly and easily and make sure it looks great on any device.


